


Installing a new rifle scope is only the first step. Before heading into the field or the range, you’ll need to make sure the optic is properly zeroed. Even the best rifle scopes won’t deliver consistent accuracy if the point of aim doesn’t match the point of impact.
If you’re wondering how to zero a rifle scope or how to adjust a rifle scope, don’t worry, it’s much easier than it sounds. With a stable setup, the right adjustments, and a little patience, you can quickly get your rifle shooting exactly where you aim.
1. What Is Rifle Scope Zero?
Before learning how to adjust a scope on a rifle, it’s important to understand what “zero” actually means.
When you look through your rifle scope, the reticle marks where you intend to hit. The bullet, however, won’t naturally land at that exact spot until the scope has been adjusted correctly.
Zeroing simply means matching:
- Point of Aim (POA) — where the reticle is placed
- Point of Impact (POI) — where the bullet actually lands
Once these two points line up at your chosen distance, your rifle scope is considered zeroed.
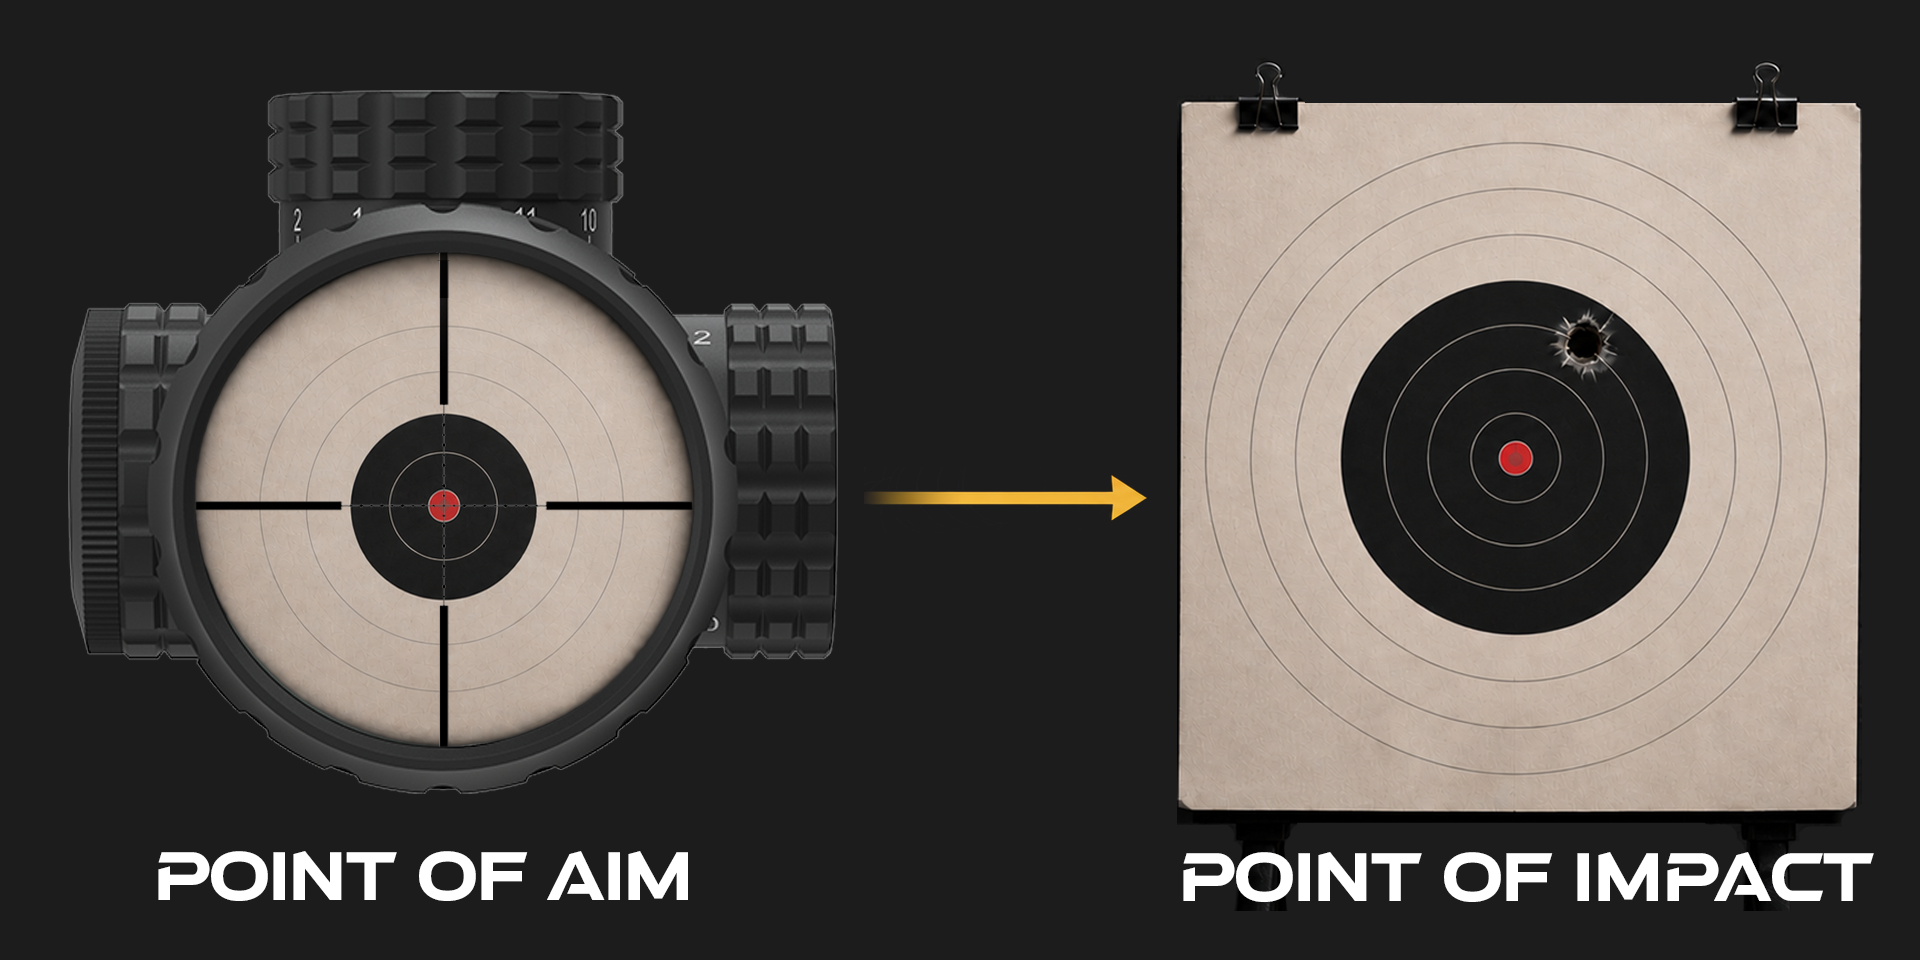
Many modern rifle scopes also include a zero stop feature. After dialing for longer distances, zero stop lets you return instantly to your original zero without guessing how many clicks to turn back. It’s especially useful for long-range shooting where elevation adjustments are made frequently.
2. Why Do You Need to Zero a Rifle Scope?
Many new shooters ask why a scope needs to be zeroed in the first place. The answer comes down to basic geometry.
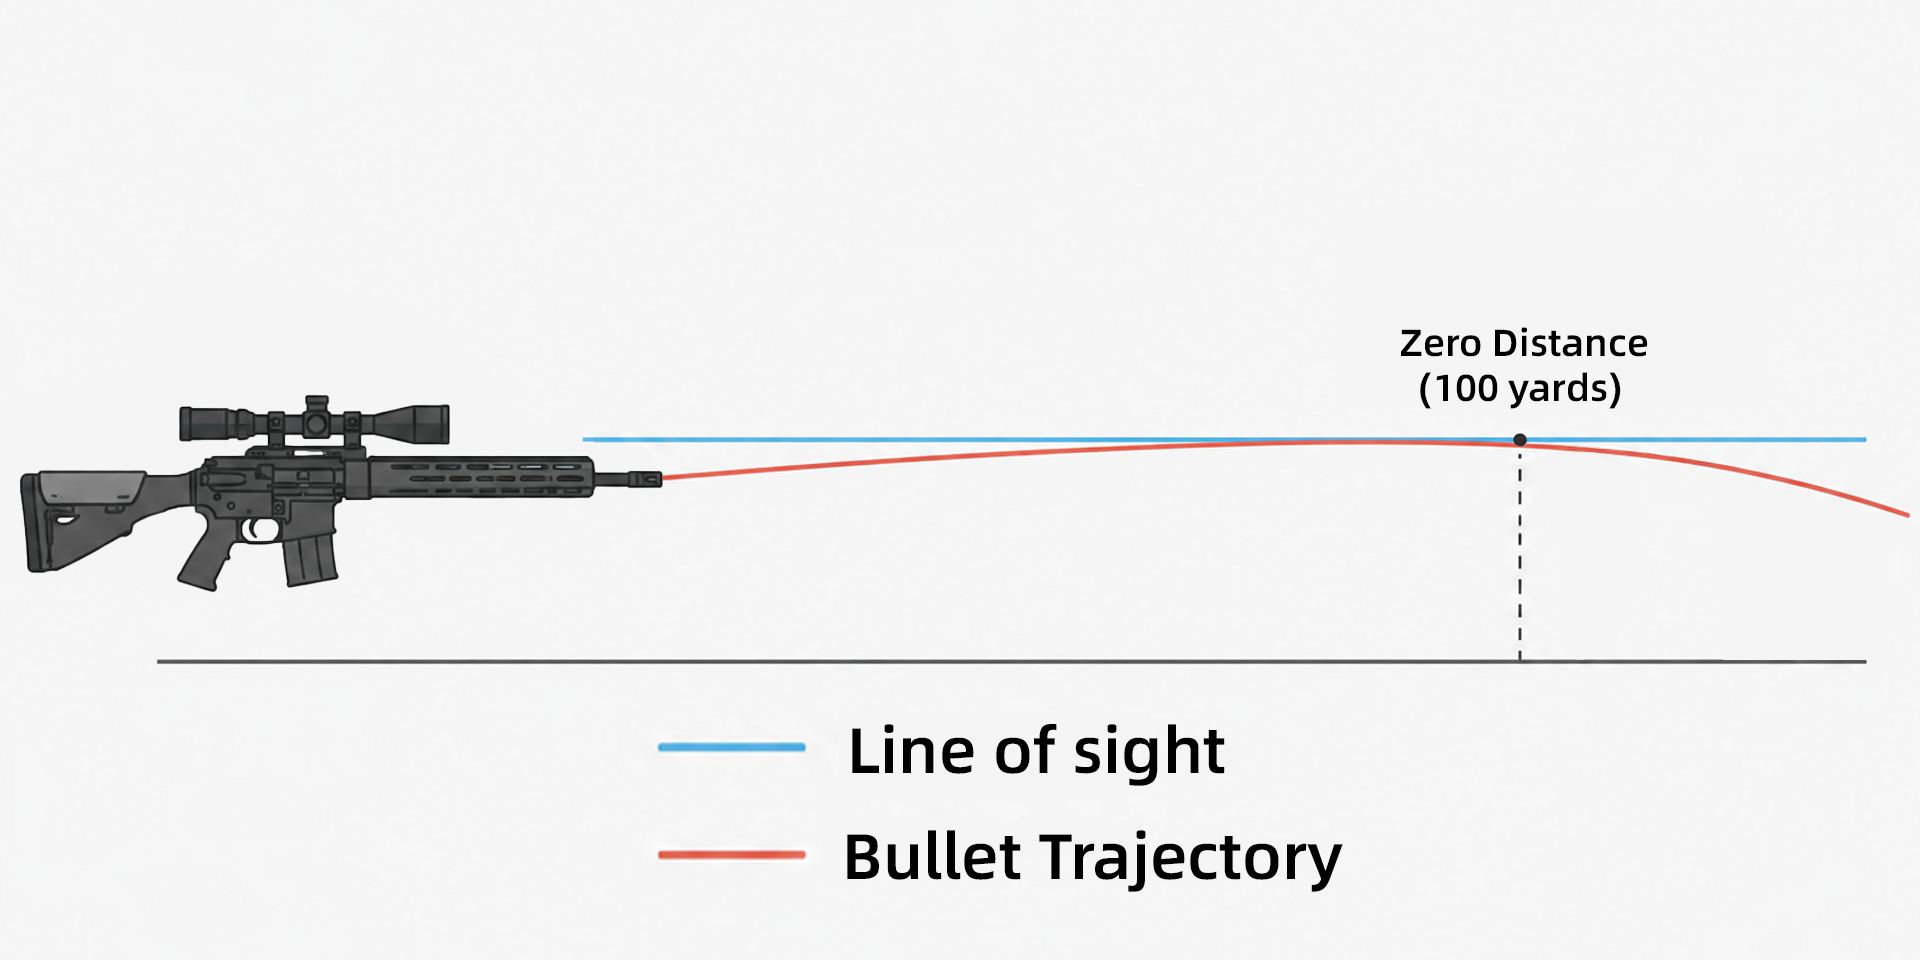
Your rifle scope sits above the barrel, so your line of sight and the bullet’s flight path are not naturally aligned. While your reticle looks in a straight line, the bullet immediately begins to drop due to gravity.
Zeroing adjusts the optic so the bullet crosses your line of sight at a chosen distance—commonly 100 yards. That distance becomes your rifle scope zero.
Without proper zeroing, even a small aiming error can become a large miss as the shooting distance increases.
3. What Should You Prepare Before Zeroing?
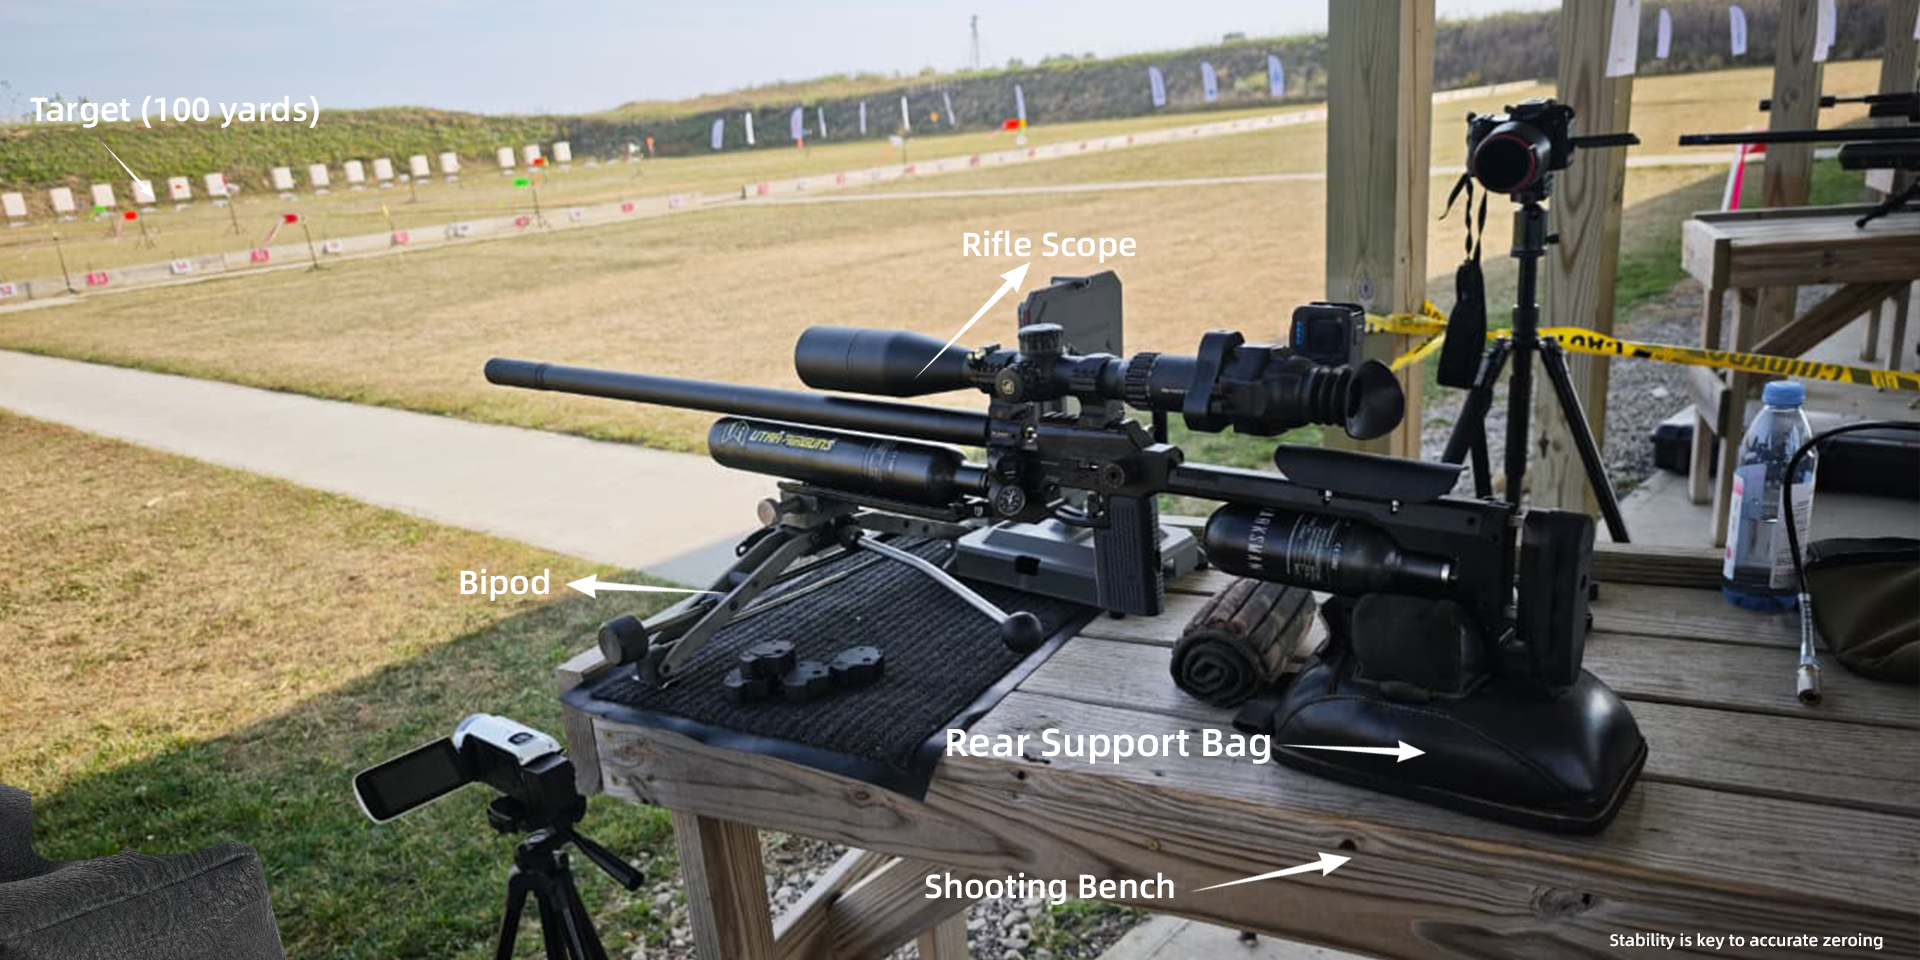
A successful zero starts with a stable shooting setup. The more consistent your position is, the easier it will be to make accurate adjustments.
Before firing your first round, it’s also a good idea to perform a visual or laser bore sight. While it won’t replace live-fire zeroing, it helps get your scope close to the target and saves both time and ammunition.
Before you start, you’ll need:
- A rifle with a securely mounted rifle scope
- A stable shooting rest, bipod, or sandbags
- A paper target with a clear aiming point
- A tape measure or ruler for measuring corrections
- A safe shooting environment
- The same ammunition you plan to use regularly
Before shooting, double-check that the scope rings and base are tightened to the manufacturer’s recommended torque. A loose mount can cause the optic to shift under recoil and make it impossible to hold a consistent zero.
Once everything is secure, you’re ready to begin adjusting the scope and fine-tuning your zero.
4. How to Zero a Rifle Scope in 5 Simple Steps
Now it’s time to put everything together. The zeroing process is straightforward: shoot, check, adjust, and repeat until your shots land exactly where you aim.
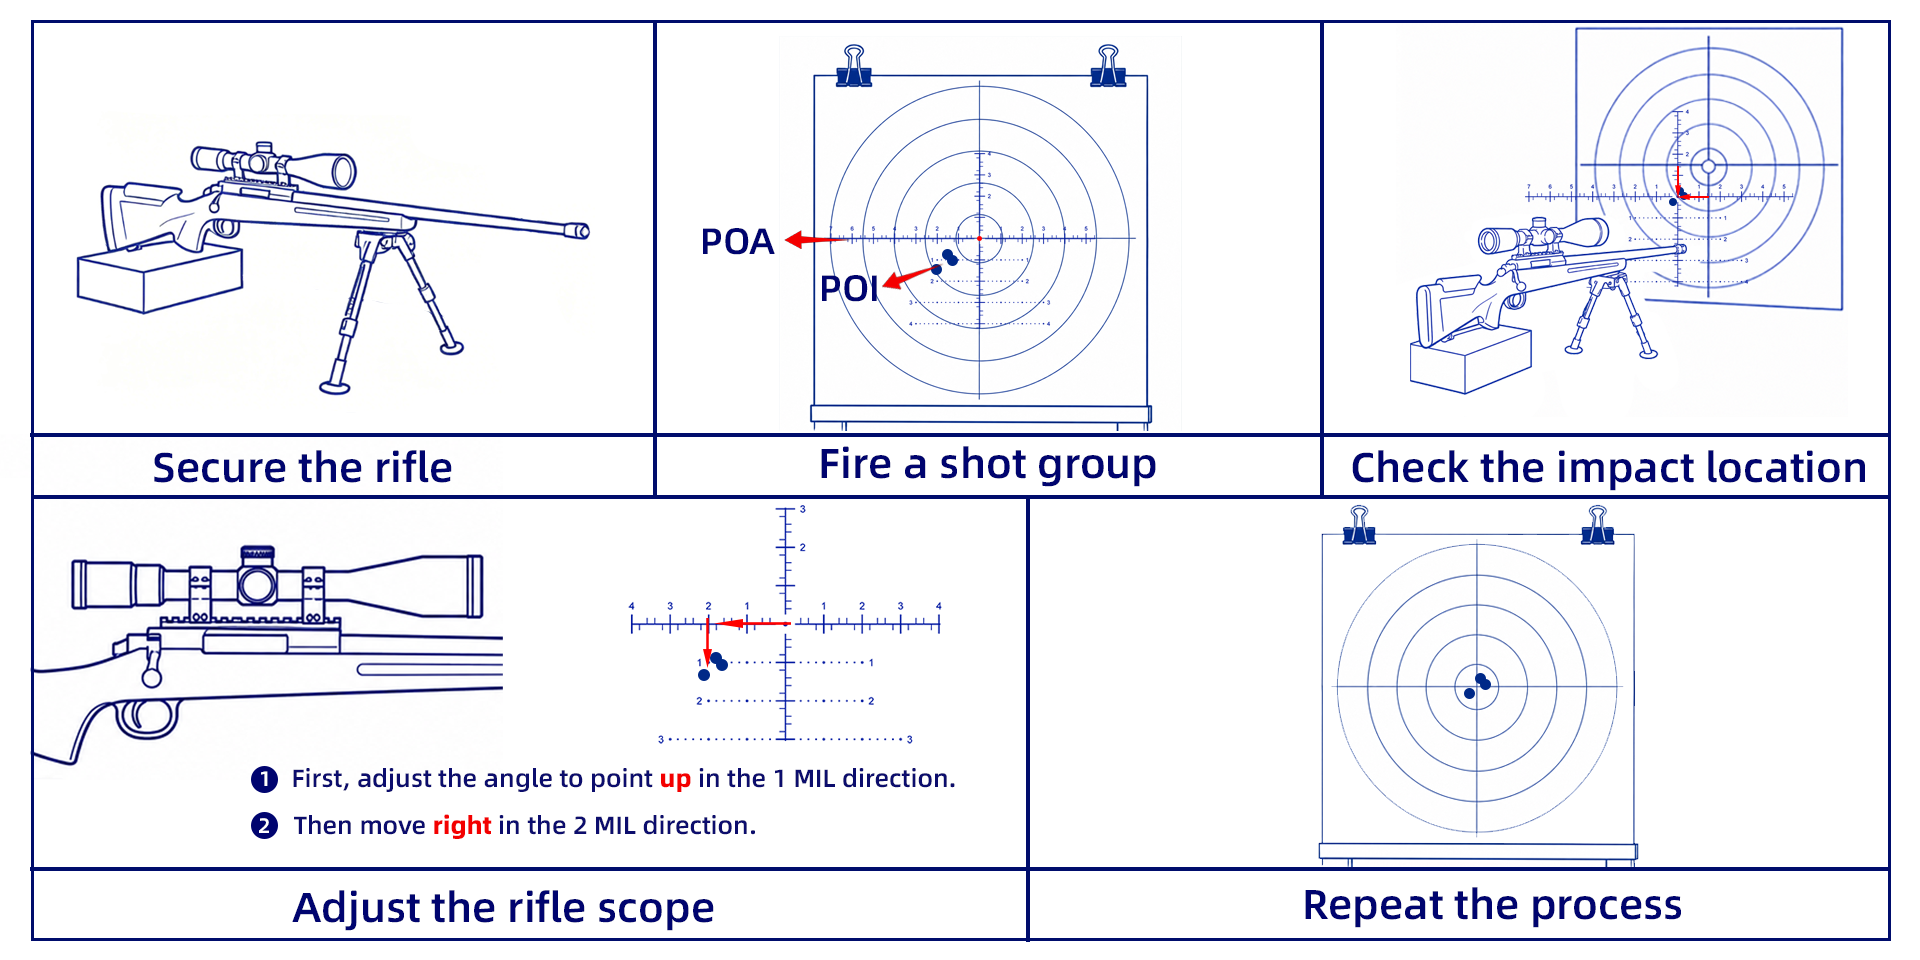
Step 1: Secure the Rifle
Place your rifle on a stable shooting rest, bipod, or sandbags to minimize movement. Before firing, use a visual or laser bore sight to roughly align the rifle scope with the barrel. This simple step helps you get on paper faster and saves ammunition.
Step 2: Fire a Three- to Five-Shot Group
Aim at the center of the target and fire a controlled group of three to five rounds.
Avoid adjusting your scope after a single shot. A group gives you a much more accurate picture of your rifle’s true point of impact and reduces the effect of shooter error.
Step 3: Find the Center of the Group
Instead of chasing individual bullet holes, locate the average center of the shot group.
Compare the center of the group with your aiming point to determine how much correction is needed before you adjust the rifle scope.
Step 4: Adjust the Rifle Scope
This is where many beginners ask how to adjust a rifle scope correctly.
Every rifle scope has two primary adjustments:
- Elevation – moves bullet impact up or down
- Windage – moves bullet impact left or right
For example, if your group lands high and right, dial Down on the elevation turret and Left on the windage turret until the impacts move toward the center.
Understanding Click Value
Most hunting rifle scopes use ¼ MOA per click.
If your group is 2 inches right at 100 yards, you’ll need 8 clicks left to correct it.
MIL-based scopes work the same way. If the impact is 1.5 MIL low and each click equals 0.1 MIL, dial 15 clicks up.
No matter which adjustment system your scope uses, make small corrections, then fire another group to verify the result instead of making large changes all at once.
Step 5: Repeat Until You’re Zeroed
Continue the same process:
Shoot → Check → Adjust → Repeat
Each adjustment should bring your group closer to the center of the target. Once the point of impact consistently matches your point of aim, your rifle scope zero is complete.
5. Confirm Your Rifle Scope Zero
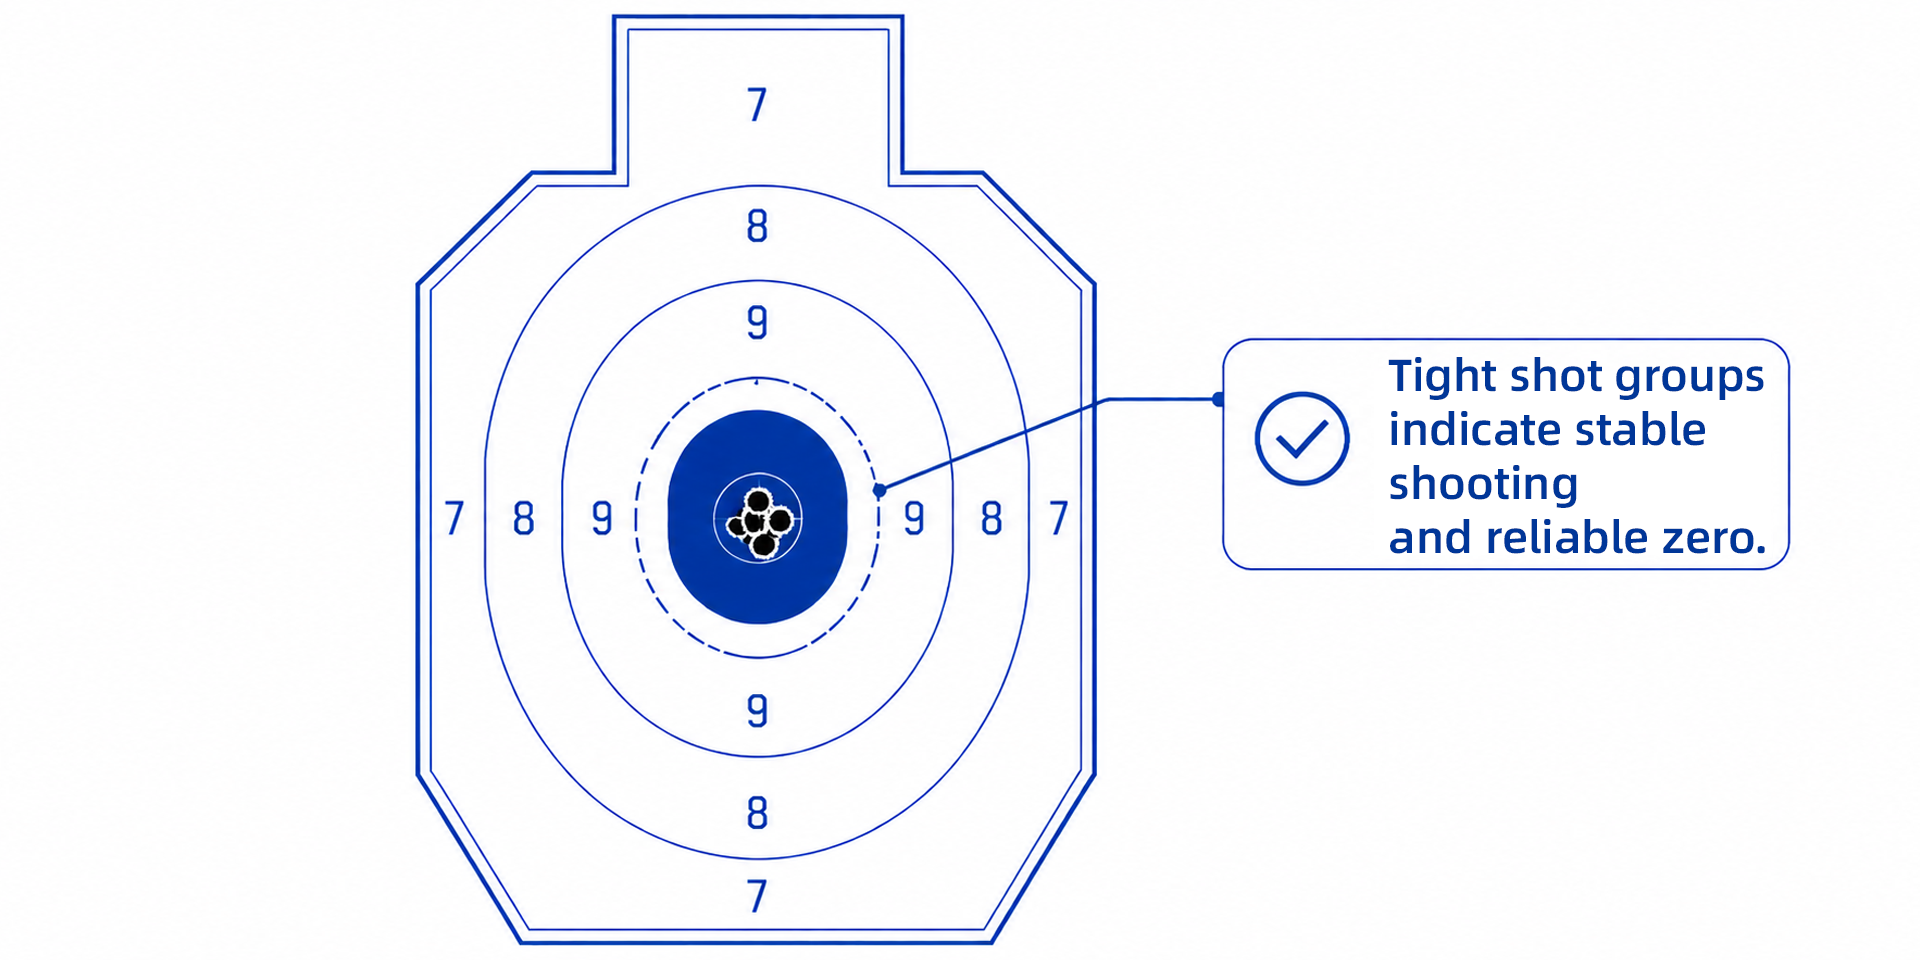
Before calling it finished, fire one final three- to five-shot group.
A properly zeroed rifle scope should produce:
- Consistent shot groups
- Bullet impacts centered on the target
- Repeatable results without unexpected shifts
For precision rifles, a group close to 1 MOA is generally considered a solid benchmark, although acceptable accuracy depends on both the rifle and the ammunition.
Advanced shooters may also perform a box test after zeroing to confirm that the scope tracks accurately when dialing elevation and windage.
6. Common Rifle Scope Zeroing Mistakes
Even experienced shooters can lose time and ammunition by making a few simple mistakes. If your groups aren’t improving, check these common issues before changing your setup.
Adjusting After Every Shot
One bullet doesn’t tell the whole story. Always fire a three- to five-shot group before making any rifle scope adjustments.
Shooting Without a Stable Rest
A shaky position makes it difficult to judge whether the error comes from the rifle or the shooter. Use a bipod, shooting bags, or a solid bench whenever possible.
Turning the Turrets the Wrong Way
Before making corrections, check the direction arrows on the elevation and windage turrets. Every rifle scope is slightly different.
Making Large Corrections
If you’re learning how to adjust a rifle scope, small adjustments are usually the safest approach. Overcorrecting often creates more work.
Ignoring Parallax
When your scope has a side-focus or adjustable objective, set the parallax correctly. An incorrect setting can shift the apparent aiming point, especially at longer distances.
Overheating the Barrel
Firing too quickly heats the barrel and may change bullet impact. Allow the rifle to cool between groups for more consistent results.
Forgetting Weather Conditions
Wind, temperature, altitude, and even ammunition changes can affect your point of impact. Try to zero under conditions similar to where you’ll actually shoot.
7. Final Thoughts
Learning how to zero a rifle scope is one of the most important skills every shooter should master. Once your optic is properly zeroed, every adjustment becomes more predictable and every shot more consistent.
Take your time, use a stable shooting position, make small corrections, and verify your results with multiple shot groups. Whether you’re hunting, target shooting, or practicing at the range, a correctly adjusted rifle scope gives you the confidence to shoot accurately when it matters most.
FAQ
Q1. What is the best distance to zero a rifle scope?
For most hunting and recreational shooting, 100 yards is the most common zero distance. However, some rifles and ammunition perform better with a 50- or 200-yard zero. Check your ballistic data and choose the distance that best matches your intended use.
Q2. How many rounds does it take to zero a rifle scope?
Most shooters need 15 to 30 rounds to complete the process. Fire three- to five-shot groups, make small corrections, and confirm each adjustment before moving on.
Q3. When should I re-zero my rifle scope?
Check your zero whenever you remove the scope, replace the mounts, switch ammunition, or if the rifle has taken a hard impact. It’s also a good idea to confirm zero before an important hunt or competition.
Q4. What is zero shift?
Zero shift happens when your bullets no longer hit the same point after the optic has been moved or the mounting system has changed. Loose screws, improper installation, or heavy recoil are common causes. A properly mounted rifle scope helps prevent this problem.
Q5. Is zeroing different for FFP and SFP rifle scopes?
No. The zeroing procedure is exactly the same for both.
The difference is in the reticle. On an FFP rifle scope, the reticle scale stays accurate at every magnification. On an SFP rifle scope, the scale is only accurate at one designated magnification, usually the highest setting.
Get a Free Quote Now!
Feel free to contact us anytime to get the best prices!